# Write your first smart contract
Smart contracts can seem intimidating and yes, they are challenging! But on the XPR Network, you can write smart contracts in TypeScript, and that’s a game-changer. Why? Let’s list the advantages:
- No need to learn a new programming language.
- No need to spend hours configuring your environment.
- Access to built-in functions, classes, and interfaces to handle KV, NFTs, tokens, and more.
With XPR Network, your entire project—backend, frontend, and smart contract—can be fully TypeScript. Sweet! But before diving into code, let’s cover the basics.
# What is a Smart Contract?
It might sound like a silly question, but it's good to clarify.
A smart contract is essentially a "simple piece of software" that executes a linear process: it reads values, checks conditions, and (usually) writes values. That’s it.
We encounter smart contracts every day in the form of automated processes. The best analogy is a vending machine: insert a coin, choose a snack, and if the conditions are met (e.g., correct amount entered), you get your snack. Otherwise, the machine returns your coin.
This process is linear, predictable, and deterministic. That last word is key. Smart contracts must always produce the same result for the same input. That’s why they can’t perform random operations.
# Smart Contracts and Resources
XPR Network uses a resource system, a kind of "Holy Trinity": CPU, NET, and RAM.
CPU: Computation time (in milliseconds). Each contract action must be completed within 30 ms. Your account receives 3.23 seconds of CPU at creation—enough to execute several actions.
NET: The amount of data transmitted across the chain (in bytes). Each action's input consumes NET bandwidth. Every new account receives 16.6MB of NET—plenty for many actions.
RAM: On-chain storage (in bytes). RAM is scarce and should be used wisely. As a smart contract developer, you're responsible for managing RAM for your users.
To keep your contract scalable:
- Keep operations under 30ms (CPU).
- Limit the data sent per operation (NET).
- Minimize storage requirements (RAM).
You’ll need to understand how to count storage in bytes.
To measure how much by row in a table could consume, you should know how many bytes each type requires. Basic types generally tell you how many BITS they carry. Like u8 is a 8bits representation of a number. 1 bytes = 8 bits so the storage of a u8 in your table will consume 1 byte of ram. So the rest is easy to grasp:
| u8 / i8 | 1 byte |
|---|---|
| u16 / i16 | 2 bytes |
| u32 / i32 | 4 bytes |
| u64 / i64 | 8 bytes |
| u128 / i128 | Yeah you get it… 16 bytes |
| string | 1 byte for null char if empty 1 Byte per char + 1 byte for null char |
| Array<type> | Size of <type> * array length + 4 bytes for array length |
# Storage System and Data Structure
The storage system is not query-based like SQL. It is intentionally limited for performance reasons. You can't use complex queries, foreign keys, views, or full-text search.
Instead, you typically:
- Use numeric values for lookups
- Define ranges with lower and upper bounds
- Use
fororwhileloops for scanning
This may feel unintuitive at first. That's why it helps to understand types, scopes, and bounds before writing code.
Pro-tip: sketch your data structures on paper before implementing them.
# Smart Contract Terminology
A quick reference:
- Contract: Your main smart contract file.
- Tables: Store contract data (e.g., user balances, settings).
- Row: A single entry in a table.
- Scope: A group of entries in a table.
- Actions: Functions triggered to perform tasks like transferring tokens or updating balances.
- Inline Actions: External actions that your contract can call.
- Notification: Triggers sent between contracts.
- ABI : A schematic description of your contract and how the system should decode bytes from blocks and encode contract inputs .
- WASM: Compiled file representing your contract.
If you’re unfamiliar with these terms, refer to the "Terminology You Need to Know" guide before continuing.
# What Are We Building?
In this tutorial, we’ll build the "greeting" contract from Chapter 2 (Signing and Pushing Transactions). The contract allows users to post a greeting message by paying 10 XPR. We’ll add an escrow feature:
An escrow is a third party holding tokens or assets on behalf of users, releasing them when conditions are met.
Our contract will hold tokens for users to allow them to post greeting messages.
# Ready ? Steady, GO!
Now we are ready to go! So let's use our good pal, the proton/CLI. If you haven’t installed this bad boy yet please refer to the proton CLI crash course and follow the installation process.
Once it’s done create a new folder from your terminal and access it, run the following command
proton generate:contract myfirstcontract
It will run the interactive prompt command to create the smart contract. The interactive prompt is a way to scaffold your smart contract by providing actions names, params and types. For the sake of this tutorial, we will bypass the process.
? Enter new action name:
Type transfer as the action name and press the enter key
? Do you want to add parameters to the action? (y/N)
Answer N here and press the enter key
? Do you want to add one more action? (y/N)
Answer N here and press the enter key
? Choose your preferred package manager: (Use arrow keys)
❯ npm
  yarn
Finally choose your favorite package manager and hit enter
And the generation process starts, after a few minutes the process should have generated required files and installed the required packages.
Open the contract folder in your favorite code editor, it should look like this
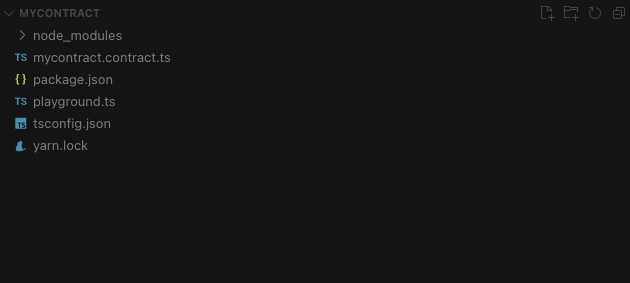
The file named mycontract.contract.ts is your main contract file, the playground.ts file is a, as the name suggests, a way to perform some tests on your contract without deploying it, we will see this file later.
Open the contract file, and you should have the following code
import { Contract } from "proton-tsc";

@contract
export class mycontract extends Contract {

    @action("transfer")
    transfer(): void {
        // Add here a code of your contract
    }
}
Let’s break down the contract structure. The @contract decorator tells the compiler the class below is a smart contract then we export our class that extends the Contract from the proton-tsc package. Inside the class, the @action decorator will generate an action named transfer with the following function as handler.
It’s pretty empty isn't it? Yes, but before adding real functionality, let’s focus on the action.
We named the action transfer but it's just a default name, to be a real transfer action, i mean an action that could handle token transfer, we need to add more stuff. First we need to add parameters, a transfer token action requires 4 parameters. Let's introduce each of them and their types. If you are not familiar with types, please read the Data Types guide.
- from: the emitter account of the token transfer as Name
- to: the recipient account of the token transfer as Name
- quantity: the quantity of transferred token as Asset
- memo: an arbitrary note to the transfer as String
Let’s do it
import { Asset, Contract, Name} from "proton-tsc";

@contract
export class mycontract extends Contract {

    @action("transfer")
    transfer(from:Name,to:Name, quantity: Asset, memo:string): void {
        // Add here a code of your contract
    }
}
Ok cool, before defining our transfer feature, I would like to introduce the notify flag. This flag is set on the @action, it defines that the action is triggered by a notification from another contract… WUUUT ?
When you define a contract’s action, you can specify that the action dispatches a notification to the account(s) involved in the action. If the notified account(s) have a contract that implements the same action defined as notification, it will be triggered.
So if you send some XPR to an account, the eosio.token contract , the contract that drives the XPR token, will notify both of the accounts. If any account has a contract that handles the transfer action as notification, the action will be triggered.
So, once we set the notify flag on our transfer action, the action itself becomes unavailable to be called directly, but will be called through the notification system. Let’s modify our contract:
import { Asset, Contract, Name} from "proton-tsc";

@contract
export class mycontract extends Contract {

    @action("transfer",notify)
    transfer(from:Name,to:Name, quantity: Asset, memo:string): void {
        // Add here a code of your contract
    }
}
Youhou… but our action still useless, let’s move to the next step, let’s add a table for storage:
# Let’s build some tables
Let's build a table. Add a new folder in your project, smartly named tables
You can use the CLI to generate a new table
proton generate:table greets
I'm not a big fan of this method, I prefer to create my table manually, I also like to name my file with a .table.ts. It's just my own convention, it changes nothing.
But if you feel not so confident with creating table manually, you can go with the CLI prompt with some benefit
- Table names and methods are validated, protects you from doing mistakes.
- CLI helps to generate a valid table structure.
- The table is added automatically to contract imports and added as a property to the contract.
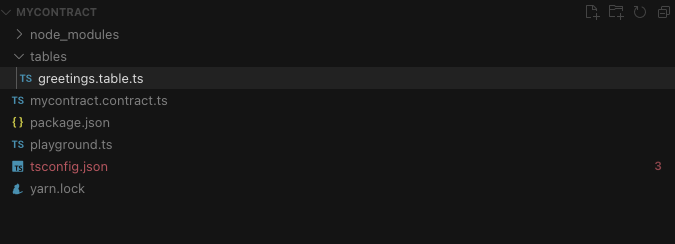
Open the greeting.table.ts, here is the skeleton.
import { Table } from "proton-tsc";

@table('greets')
export class GreetingTable extends Table {
  constructor() {
    super()
  }
}
To create a storage table, you use the @table() decorator to tell the compiler that’s a table and provide the table a Name (with capital N cause it have the same behaviors as the type) and extend the Table class, where the constructor parameters define the columns and their types in your table.
As you can see, we import the abstract table class from the proton-tsc package. Then we declare the @table decorator and define our table name as greetings, make sure this name respects the Name rules (the type), this name will be your reference to fetch your data through RPC. After that, we export our class that extends the Table class. The name of the class will be a reference for the code, it has no incidence on the contract itself. Finally we add our constructor with a call for super() that applies the constructor from the extended class.
You will see that tables are quite boring but easy to create because the pattern repeats over and over. Now we need to define the structure, the field that will be stored for each row within the table. So we need a key field which will be our unique identifier of the row, a owner field that holds the account that has generated the string message.
So let’s add those fields
import { EMPTY_NAME, Name, Table } from "proton-tsc";

@table('greets')
export class GreetingTable extends Table {
  constructor(
    public key: u64 = 0,
    public owner: Name = EMPTY_NAME,
    public message:string = ""
  ) {
    super()
  }
}
You must define the parameters as public, and provide a default value for each according to their type.
Now we need to tell the compiler what field is the primary key with the @primary decorators before the getters and setters of the field. Key is our unique identifier, so we will define it as our primary key !
import { EMPTY_NAME, Name, Table } from "proton-tsc";

@table('greets')
export class GreetingTable extends Table {
  constructor(
    public key: u64 = 0,
    public owner: Name = EMPTY_NAME,
    public message:string = ""
  ) {
    super()
  }

  @primary()
  get by_key(): u64 {
    return this.key;
  }

  set by_key(value: u64) {
    this.key = value;
  }
}
And voilà our first table is ready ! Let’s add another one.
Since our contracts need an. Our greeting system needs a table to handle the escrow feature. Let’s create a tickets.table.ts in our tables folder.
import { EMPTY_NAME, Name, Table } from "proton-tsc";

@table('tickets')
export class TicketsTable extends Table {
  constructor(
    public owner: Name = EMPTY_NAME,
    public count:u32 = 0
  ) {
    super()
  }

  @primary()
  get by_owner(): u64 {
    return this.owner.N;
  }

  set by_owner(value: u64) {
    this.owner = Name.fromU64(value);
  }

}
As you can see, the structure is pretty the same as the greets table class, but it has a big difference. Here we use the owner as the primary key! As you should know (yeah you should, really) the Nametype is a “string” that could be read as a number (u64) and because we want to maintain the number of times an account pay to post a message in the count field, and decrease it when the user post a message, we need the primary key to be unique per account.
To achieve this, we take advantage of the getter and setter of the primary key, the getter returns the u64 value of the owner name, and the setter assigns the u64 value to a name with the Name’s static function fromU64.
Just to make the next steps cleaner and keep our code easy to maintain, let’s export our table from a index.ts
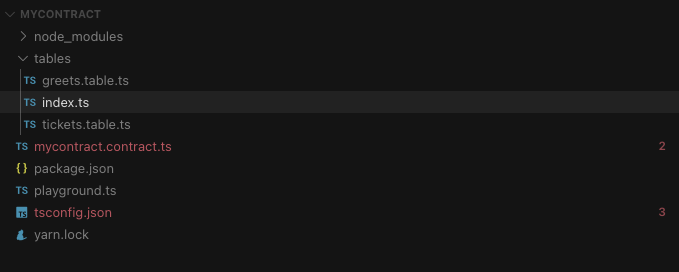
The content of the index file just reference our 2 tables as export
export * from './greets.table';
export * from './tickets.table';
# Glue everything together
Now it’s time to put everything at work! Let's go back to our smart contract file and reference our tables as private.
import { Contract, TableStore } from "proton-tsc";
import { GreetsTable, TicketsTable } from "./tables";

@contract
export class mycontract extends Contract {

    private greetsTable:TableStore<GreetsTable> = new TableStore<GreetsTable>(this.firstReceiver,this.firstReceiver)

    private ticketsTable:TableStore<TicketsTable> = new TableStore<TicketsTable>(this.firstReceiver,this.firstReceiver)

    @action("transfer",notify)
    transfer(from:Name,to:Name, quantity: Asset, memo:string): void {
        // Add here a code of your contract
    }
}
We import the GreetsTable and TicketsTable from the ./tables directory. Then we create a class level private constants for each table, by using the TableStore. And we define the contract that own the table to this.receiver that means the current contract, we also define the scope of the table to the current contract, this is the value by default.
The TableStore class is an interface that wraps your table structure and provides an API to interact with the storage. You can read more about the TableStore in the dedicated documentation (opens new window).
Our user will be able to post a message for a cost of 10XPR. Let’s get back to our transfer action and start to add features. First we need to do a couple of check
- Is the transferred token XPR ?
- Is the amount equal or multiple of 10 ?
- Is the transfer
fromthe contract itself ?
Let convert it to code, for the first two, we will use the check function
import { Asset, check, Contract, Name, TableStore } from "proton-tsc";
import { GreetsTable, TicketsTable } from "./tables";

@contract
export class mycontract extends Contract {

    private greetsTable:TableStore<GreetsTable> = new TableStore<GreetsTable>(this.receiver,this.receiver)

    private ticketsTable:TableStore<TicketsTable> = new TableStore<TicketsTable>(this.receiver,this.receiver)

    @action("transfer",notify)
    transfer(from:Name,to:Name, quantity: Asset, memo:string): void {
check(quantity.symbol.getSymbolString() == "XPR", "Token must be XPR");
check(quantity.amount %10 == 0, "Amount must be a multiple of 10");
    }
}
The check accepts two parameters, the first is the condition represented by a boolean, and the second one is the error message as a string. If the condition is true the action process continues, If the condition is false, the action process is halted and the error message is returned. So for this two check we can think as
- If the token symbol IS XPR we can continue, if not we stop and send “Token must be XPR”
- If the quantity of transferred token is a multiple of 10000 (10000? I will explain it right after) we can continue, if not, we stop and send “Amount must be a multiple of 10”
Ok but what about the third check “Is the transfer from the contract itself ?”. Well, this check should not halt the action but we need to stop the process to avoid error to occur. For this, we simply use the good old if statement and return to halt the process silently.
import { Asset, check, Contract, Name, TableStore } from "proton-tsc";
import { GreetsTable, TicketsTable } from "./tables";

@contract
export class mycontract extends Contract {

    private greetsTable:TableStore<GreetsTable> = new TableStore<GreetsTable>(this.receiver,this.receiver)

    private ticketsTable:TableStore<TicketsTable> = new TableStore<TicketsTable>(this.receiver,this.receiver)

    @action("transfer",notify)
    transfer(from:Name,to:Name, quantity: Asset, memo:string): void {
check(quantity.symbol.getSymbolString() == "XPR", "Token must be XPR");
check(quantity.amount %10_0000 == 0, "Amount must be a multiple of 10");
if (from == this.receiver) return;
    }
}
Great now we are done with the checks. Now let’s store some values 🙂. We have to verify if the current user that transfers the amount has an entry or not in the tickets table. To do so we use the get method of the TableStore.
Then we need to convert the transferred amount into a ticket number, so we do a little computation by dividing the amount of transferred tokens by … 10000! Why ?? Well, because, in smart contract, the token value is displayed without a comma, and zeros are added to match the required precision. That means, for XPR by example who have a precision of 4, 1 XPR is expressed as 1000 on contract side.
We wrap the returned value from the calculus in an explicit cast as u32 to make sure it match the table type of the count field
If the current user has a row in the tickets table we update the count, if not, we create a new entry with the bought tickets count.
import { Asset, check, Contract, Name, TableStore } from "proton-tsc";
import { GreetsTable, TicketsTable } from "./tables";

@contract
export class mycontract extends Contract {

    private greetsTable:TableStore<GreetsTable> = new TableStore<GreetsTable>(this.receiver,this.receiver)
    private ticketsTable:TableStore<TicketsTable> = new TableStore<TicketsTable>(this.receiver,this.receiver)

    @action("transfer",notify)
    transfer(from:Name,to:Name, quantity: Asset, memo:string): void {
        check(quantity.symbol.getSymbolString() == "XPR", "Token must be XPR");
        check(quantity.amount % 10_0000 == 0, "Amount must be a multiple of 10");
        if (from == this.receiver) return;

	 // We use the get method from the TableStore to get a possible row
        let existingTickets = this.ticketsTable.get(from.N);	 // We convert the transfered amount into ticket
 const boughtTickets = u32(quantity.amount / 10_0000);

        if (existingTickets) {
            // If the user have row we add the bougth tickets to the entry
            existingTickets.count += boughtTickets;	     // We use the update method of the table store, the current contract is the   	     // ram payer
            this.ticketsTable.update(existingTickets, this.receiver);
        } else {
            // If the user have no row we create a new one and set boughtTickets
            const newTicket = new TicketsTable(from, boughtTickets);
            // We create the new entry in the table, the current contract is the   	     // ram payer.
            this.ticketsTable.store(newTicket, this.receiver);
        }
    }
}
If you make an abstraction of the comments, the process is quite short isn’t.
Great, our payment flow is ready, now let’s add another action to let the user create a greeting message. The action will be named greet. Before doing the process itself, our new action will also need some checks:
- Is the owner's signature valid ?
- Is the message not too long?
- Does the owner have at least 1 ticket ?
If the conditions above are met, the process would be simple, we should create a new instance of a greets and store it, and finally decrease the tickets count from the current owner. Let’s code this:
import { Asset, check, Contract, Name, requireAuth, TableStore } from "proton-tsc";
import { GreetsTable, TicketsTable } from "./tables";

@contract
export class mycontract extends Contract {

    private greetsTable:TableStore<GreetsTable> = new TableStore<GreetsTable>(this.receiver,this.receiver)
    private ticketsTable:TableStore<TicketsTable> = new TableStore<TicketsTable>(this.receiver,this.receiver)

    @action("transfer",notify)
    transfer(from:Name,to:Name, quantity: Asset, memo:string): void {
        check(quantity.symbol.getSymbolString() == "XPR", "Token must be XPR");
        check(quantity.amount % 10_0000 == 0, "Amount must be a multiple of 10");
        if (from == this.receiver) return;

        let existingTickets = this.ticketsTable.get(from.N);
 const boughtTickets = u32(quantity.amount / 10_0000);

        if (existingTickets) {
            existingTickets.count += boughtTickets;
            this.ticketsTable.update(existingTickets, this.receiver);
        } else {
            const newTicket = new TicketsTable(from, boughtTickets);
            this.ticketsTable.store(newTicket, this.receiver);
        }
    }

    @action('greet')
    postGreet(owner: Name, message: string): void {

        // Check if the owner is authorized
        requireAuth(owner);
        // Check if the message is bellow 256 chars
        check(message.length <= 256, "Greeting message is too long");
        // Get the possible ticket row or return an error
        let existingOwner = this.ticketsTable.requireGet(
owner.N,
`No ticket found for ${owner}`
  );
        // Just for the compiler to not complain
        if (!existingOwner) return;
        // Check if the user have at least 1 ticket
        check(existingOwner.count > 0, `No ticket found for ${owner}`);

        // Create the new message entry
        const newGreetMessage = new GreetsTable(
this.greetsTable.availablePrimaryKey,
owner,
message
  );
        // Store the new message entry
        this.greetsTable.store(newGreetMessage, this.receiver);

        // Decrease the message count for the current user
        existingOwner.count -= 1;
        // Update the current user row in ticketsTable
        this.ticketsTable.update(existingOwner, this.receiver);

    }
}
The first check here is one of the more important checks ! Remember this function requireAuth is a function that verifies if the account has signed the action within the transaction, if not it halts the action process and throws an error message. The second one checks if the message is below or equal to 256 characters. Why? Because we want to limit the RAM usage, of course.
After we try to get the ticket row for the owner with the requireGet method from the TableStore api. You can see this method as the same as the previously used get combined with a check to throw an error if it does not exist. Because the existingOwner could be null, the compiler could cry about it for the next lines, to make him happy, we add an extra if statement with a return. The last check is for the tickets count that should be at least 1.
After all those checks, the real process starts. We create a new GreetTable entry. The line this.greetsTable.availablePrimaryKey could be translated as “Please provide me with the next available key from this table”, then we set the greeting message owner and the message itself and store it into the table.
And finally, we decrease the tickets count for the current user and update his row from the ticket table !
# Let’s play!
Now, you may wanna deploy this contract, yes but… no. I’m sorry but before rushing to deploy our contract on-chain, better to perform some tests with the playground.ts.
The playground is a simple file that allows you to test your action in a basic environment. It uses the @proton/vert package, which emulates XPR Network in a breeze. But it has limitations… The blockchain is just like started at block 0, it has no tokens, no contract, no account. If you need something that exists on testnet or mainnet, you have to define it.
Also the playground IS NOT a testing suite. For a small contract like this it’s ok, but for a larger and more complex contract, I would suggest you create a real test suite with Mocha and Chai.
Let’s open the file:
import { Blockchain } from "@proton/vert";

async function wait(ms: number) {
    return new Promise(resolve => {
        setTimeout(resolve, ms);
    });
}

async function main() {
    const blockchain = new Blockchain();
    const contract = blockchain.createContract('mycontract', 'target/mycontract.contract');
    await wait(0);

    // Put you actions calls here
    await contract.actions.transfer([]).send('mycontract@active');
}

main();
Fortunately, the playground file has been pre-populated when we have generated the contract from the CLI. The main function creates an instance of the blockchain emulator, then it loads our contract. This blockchain.createContract loads the contract ABI and WASM file and return a new account named ‘mycontract’. The next line uses a little trick with wait(0), it’s just to give the blockchain emulator the time to handle the change.
Then we have the line to have our interest, the call of our transfer action. But it has no parameters! Remember (or scroll up) we need: from, to, quantity and then memo … But we have to create accounts, tokens and all that jazz 🙂.
Hopefully our friends from the engineering team have provided us with some helpers ! Let’s add some accounts.
import {Blockchain, mintTokens} from "@proton/vert";

async function wait(ms: number) {
  return new Promise(resolve => {
    setTimeout(resolve, ms);
  });
}

async function main() {
  const blockchain = new Blockchain();
  const contract = blockchain.createContract(
    "mycontract",
    "target/mycontract.contract"
  );

  // Create accounts
  const [mitch, alice] = blockchain.createAccounts("mitch", "alice");
  // Create tokens account with contract
  const tokens = blockchain.createContract(
    "xtokens",
    "node_modules/proton-tsc/external/xtokens/xtokens"
  );
  await wait(0);
  // Mint 10 million XPR with precision 4
  // Distribute 1 million each to mitch and alice
  await mintTokens(tokens, "XPR", 4, 10_000_000, 1_000_000, [mitch, alice]);
  await wait(0);
  // Transfer 10XPR from alice to our contract
  // This should trigger a notification on our contract
  await tokens.actions
    .transfer([
      alice.name.toString(),
      contract.name.toString(),
      "10.0000 XPR",
      "",
    ])
    .send(`${alice.name.toString()}@active`);
  }

main();
With these new lines, we have created bob and alice accounts with the createAccounts method on the blockchain emulator instance. Then we use again the createContract method to load the token contract available from the proton-tsc package in an account named xprtoken, and we mint the XPR Token with the same precision as the original XPR token: 4, with a 10_000_000 (10 million) max supply, and finally provide 1 millions to bob and alice.
Finally we add the bob account as the first parameters (the from), the second is the contract (the to), set ‘10.0000 XPR’ for the third (the quantity) and an empty string for the fourth (the memo).
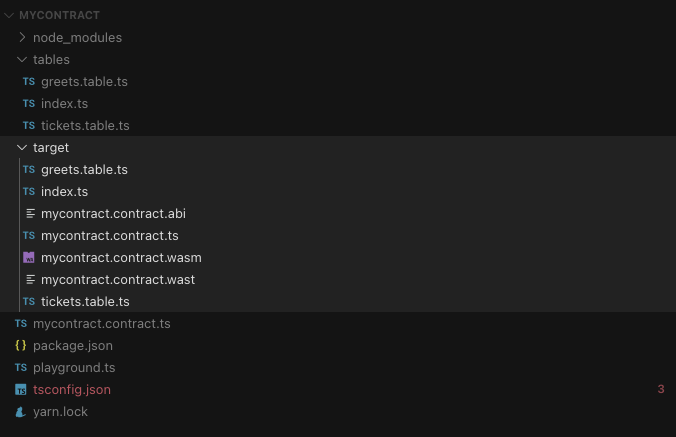
Before running the playground, we have to compile our contract to generate the target folder within our WASM and ABI file.
Open the integrated terminal of your code editor
npm run build
The terminal should print something like this
npm run build

> mycontract@0.0.0 build
> npx proton-asc mycontract.contract.ts

Build Starting ······
++++++writeFile: ../target/mycontract.contract.abi
Build progressing. Generating target files ······
Build Done. Targets generated. Target directory: target.
And you should have a new target folder containing the following:
Great, so now let’s run our playground
node ./playground.ts
Here is the output of the playground run, I have omitted some debug traces to keep the following short.
mycontract@0.0.0 playground
> npm run build && cross-env LOG_LEVEL=debug ts-node ./playground.ts


> mycontract@0.0.0 build
> npx proton-asc mycontract.contract.ts

Build Starting ······
++++++writeFile: ../target/mycontract.contract.abi
Build progressing. Generating target files ······
Build Done. Targets generated. Target directory: target.

[09:27:26] DEBUG:

START ACTION
Contract: xtokens
Action: create
Inline: false
Notification: false
First Receiver: xtokens
Sender:
Authorization: [{"actor":"xtokens","permission":"active"}]
Data: {
    "issuer": "xtokens",
    "maximum_supply": "10000000.0000 XPR"
}
Action Order: 0
Execution Order: 0

// ... omitted debug

START ACTION
Contract: xtokens
Action: issue
Inline: false
Notification: false
First Receiver: xtokens
Sender:
Authorization: [{"actor":"xtokens","permission":"active"}]
Data: {
    "to": "xtokens",
    "quantity": "10000000.0000 XPR",
    "memo": ""
}
Action Order: 0
Execution Order: 0

// ... omitted debug

START ACTION
Contract: xtokens
Action: transfer
Inline: false
Notification: false
First Receiver: xtokens
Sender:
Authorization: [{"actor":"xtokens","permission":"active"}]
Data: {
    "from": "xtokens",
    "to": "mitch",
    "quantity": "1000000.0000 XPR",
    "memo": ""
}
Action Order: 0
Execution Order: 0

// ... omitted debug

START ACTION
Contract: xtokens
Action: transfer
Inline: false
Notification: false
First Receiver: xtokens
Sender:
Authorization: [{"actor":"xtokens","permission":"active"}]
Data: {
    "from": "xtokens",
    "to": "alice",
    "quantity": "1000000.0000 XPR",
    "memo": ""
}
Action Order: 0
Execution Order: 0

// ... omitted debug

START ACTION
Contract: xtokens
Action: transfer
Inline: false
Notification: false
First Receiver: xtokens
Sender:
Authorization: [{"actor":"alice","permission":"active"}]
Data: {
    "from": "alice",
    "to": "mycontract",
    "quantity": "10.0000 XPR",
    "memo": ""
}
Action Order: 0
Execution Order: 0

// ... omitted debug

START ACTION
Contract: mycontract
Action: transfer
Inline: false
Notification: true
First Receiver: xtokens
Sender:
Authorization: []
Data: {
    "from": "alice",
    "to": "mycontract",
    "quantity": "10.0000 XPR",
    "memo": ""
}
Action Order: 0
Execution Order: 1
You can see that the playground command includes the run of the build command. This is made to make sure the contract is up to date with your last changes.
The most interesting traces are the last 2 traces. The second to last action is the transfer of 10 XPR we initiated from the alice account to mycontract account transfer through our xtokens token contract.
And so the last one is the notification of the transfer to our mycontract account: The Contract field is set to mycontract, the Notification field of the trace is set to true and the First Receiver is xtokens.
Let's see if we can explore our contract table and verify if alice has tickets.
import {Blockchain, mintTokens, nameToBigInt} from "@proton/vert";

async function wait(ms: number) {
  return new Promise(resolve => {
    setTimeout(resolve, ms);
  });
}

async function main() {
  const blockchain = new Blockchain();
  const contract = blockchain.createContract(
    "mycontract",
    "target/mycontract.contract"
  );

  // Create accounts
  const [mitch, alice] = blockchain.createAccounts("mitch", "alice");
  // Create tokens account with contract
  const tokens = blockchain.createContract(
    "xtokens",
    "node_modules/proton-tsc/external/xtokens/xtokens"
  );
  await wait(0);
  // Mint 10 million XPR with precision 4
  // Distribute 1 million each to mitch and alice
  await mintTokens(tokens, "XPR", 4, 10_000_000, 1_000_000, [mitch, alice]);
  await wait(0);
  // Transfer 10XPR from alice to our contract
  // This should trigger a notification on our contract
  await tokens.actions
    .transfer([
      alice.name.toString(),
      contract.name.toString(),
      "10.0000 XPR",
      "",
    ])
    .send(`${alice.name.toString()}@active`);

  await wait(0);
  // Reading all rows from tickets table on mycontract
  const rows = await contract.tables
    .tickets(nameToBigInt("mycontract"))
    .getTableRows();
  // Output available rows
  const output = rows.map((row: any) => {
    return `Account ${row.owner} have ${row.count} ticket(s)`;
  });
  console.log(output.join("\n"));
}

main();
Great, let’s see what the playground outputs, run it again!
I just kept the end of the traces
// ... omitted debug
START ACTION
Contract: mycontract
Action: transfer
Inline: false
Notification: true
First Receiver: xtokens
Sender:
Authorization: []
Data: {
"from": "alice",
"to": "mycontract",
"quantity": "10.0000 XPR",
"memo": ""
}
Action Order: 0
Execution Order: 1
// ... omitted debug
Account alice have 1 ticket(s)
Great, let's make another round of modification. Alice will buy 3 tickets for 30 XPR, mitch will transfer 12 XPR and it should raise an error. Then alice will post a message, and we will verify tables again.
import {Blockchain, mintTokens, nameToBigInt} from "@proton/vert";

async function wait(ms: number) {
  return new Promise(resolve => {
    setTimeout(resolve, ms);
  });
}

async function main() {
  const blockchain = new Blockchain();
  const contract = blockchain.createContract(
    "mycontract",
    "target/mycontract.contract"
  );

  // Create accounts
  const [mitch, alice] = blockchain.createAccounts("mitch", "alice");
  // Create tokens account with contract
  const tokens = blockchain.createContract(
    "xtokens",
    "node_modules/proton-tsc/external/xtokens/xtokens"
  );
  await wait(0);
  // Mint 10 million XPR with precision 4
  // Distribute 1 million each to mitch and alice
  await mintTokens(tokens, "XPR", 4, 10_000_000, 1_000_000, [mitch, alice]);
  await wait(0);
  // Transfer 30XPR from alice to our contract for 3 tickets
  // This should trigger a notification on our contract
  await tokens.actions
    .transfer([
      alice.name.toString(),
      contract.name.toString(),
      "30.0000 XPR",
      "",
    ])
    .send(`${alice.name.toString()}@active`);

  await wait(0);

  // Transfer 12XPR from mitch to our contract
  // This should throw an error
  // so we catch it to be sure our playground continue
  try {

    await tokens.actions
    .transfer([
      mitch.name.toString(),
      contract.name.toString(),
      "12.0000 XPR",
      "",
    ])
    .send(`${mitch.name.toString()}@active`);

  } catch (e: any) {
    // Logging the error
    console.log(e)
  }
  // Reading all rows from tickets table on mycontract
  const rows = await contract.tables
    .tickets(nameToBigInt("mycontract"))
    .getTableRows();
  // Output available rows
  const output = rows.map((row: any) => {
    return `Account ${row.owner} have ${row.count} ticket(s)`;
  });
  console.log(output.join("\n"));
}

main();
Now we run our playground again and here is the output
// ... omitted debug

START ACTION
Contract: xtokens
Action: transfer
Inline: false
Notification: false
First Receiver: xtokens
Sender:
Authorization: [{"actor":"alice","permission":"active"}]
Data: {
    "from": "alice",
    "to": "mycontract",
    "quantity": "30.0000 XPR",
    "memo": ""
}
Action Order: 0
Execution Order: 0

// ... omitted debug

START ACTION
Contract: mycontract
Action: transfer
Inline: false
Notification: true
First Receiver: xtokens
Sender:
Authorization: []
Data: {
    "from": "alice",
    "to": "mycontract",
    "quantity": "30.0000 XPR",
    "memo": ""
}
Action Order: 0
Execution Order: 1

// ... omitted debug

START ACTION
Contract: xtokens
Action: transfer
Inline: false
Notification: false
First Receiver: xtokens
Sender:
Authorization: [{"actor":"mitch","permission":"active"}]
Data: {
    "from": "mitch",
    "to": "mycontract",
    "quantity": "12.0000 XPR",
    "memo": ""
}
Action Order: 0
Execution Order: 0

// ... omitted debug

START ACTION
Contract: mycontract
Action: transfer
Inline: false
Notification: true
First Receiver: xtokens
Sender:
Authorization: []
Data: {
    "from": "mitch",
    "to": "mycontract",
    "quantity": "12.0000 XPR",
    "memo": ""
}
Action Order: 0
Execution Order: 1

// ... omitted debug

[11:18:24] DEBUG: revert item update
[11:18:24] DEBUG: revert item update
Error: eosio_assert: Amount must be a multiple of 10
    at eosio_assert

// ... omitted debug

Account alice have 3 ticket(s)
Great as expected the mitch transfer throw an error and alice receive 3 tickets to post message
Ok now the final round, alice will post a message that should reduce her tickets to 2. Mitch will also post a message and that should throw an error according to our check in the greet action
import {Blockchain, mintTokens, nameToBigInt} from "@proton/vert";

async function wait(ms: number) {
  return new Promise(resolve => {
    setTimeout(resolve, ms);
  });
}

async function main() {
  const blockchain = new Blockchain();
  const contract = blockchain.createContract(
    "mycontract",
    "target/mycontract.contract"
  );

  // Create accounts
  const [mitch, alice] = blockchain.createAccounts("mitch", "alice");
  // Create tokens account with contract
  const tokens = blockchain.createContract(
    "xtokens",
    "node_modules/proton-tsc/external/xtokens/xtokens"
  );
  await wait(0);
  // Mint 10 million XPR with precision 4
  // Distribute 1 million each to mitch and alice
  await mintTokens(tokens, "XPR", 4, 10_000_000, 1_000_000, [mitch, alice]);
  await wait(0);
  // Transfer 30XPR from alice to our contract for 3 tickets
  // This should trigger a notification on our contract
  await tokens.actions
    .transfer([
      alice.name.toString(),
      contract.name.toString(),
      "30.0000 XPR",
      "",
    ])
    .send(`${alice.name.toString()}@active`);

  await wait(0);
  // Transfer 12XPR from mitch to our contract
  // This should throw an error
  // so we catch it to be sure our playground continue
  try {

    await tokens.actions
    .transfer([
      mitch.name.toString(),
      contract.name.toString(),
      "12.0000 XPR",
      "",
    ])
    .send(`${mitch.name.toString()}@active`);

  } catch (e: any) {
    // Logging the error
    console.log(e)
  }

  await wait(0);
  // alice trigger the greet action on our contract
  // With a message
  try {

    await contract.actions
      .greet([
        mitch.name.toString(),
        "XPR Network devs rules!",
      ])
      .send(`${mitch.name.toString()}@active`);

  } catch (e: any) {
    console.log(e)
  }
  await contract.actions
  .greet([
    alice.name.toString(),
    "XPR Network devs rules!",
  ])
  .send(`${alice.name.toString()}@active`);

  await wait(0);
  // Reading all rows from tickets table on mycontract
  const ticketsRows = await contract.tables
    .tickets(nameToBigInt("mycontract"))
    .getTableRows();
  // Output available rows
  const ticketsOutput = ticketsRows.map((row: any) => {
    return `Account ${row.owner} have ${row.count} ticket(s)`;
  });
  console.log(ticketsOutput.join("\n"));

  const greetsRows = await contract.tables
    .greets(nameToBigInt("mycontract"))
    .getTableRows();
  // Output available rows
  const greetsOutput = greetsRows.map((row: any) => {
    return `Account ${row.owner} has posted "${row.message}"`;
  });
  console.log(greetsOutput.join("\n"));
}

main();
START ACTION
Contract: mycontract
Action: transfer
Inline: false
Notification: true
First Receiver: xtokens
Sender:
Authorization: []
Data: {
    "from": "alice",
    "to": "mycontract",
    "quantity": "30.0000 XPR",
    "memo": ""
}
Action Order: 0
Execution Order: 1

// ... omitted debug

START ACTION
Contract: xtokens
Action: transfer
Inline: false
Notification: false
First Receiver: xtokens
Sender:
Authorization: [{"actor":"mitch","permission":"active"}]
Data: {
    "from": "mitch",
    "to": "mycontract",
    "quantity": "12.0000 XPR",
    "memo": ""
}
Action Order: 0
Execution Order: 0

// ... omitted debug

START ACTION
Contract: mycontract
Action: transfer
Inline: false
Notification: true
First Receiver: xtokens
Sender:
Authorization: []
Data: {
    "from": "mitch",
    "to": "mycontract",
    "quantity": "12.0000 XPR",
    "memo": ""
}
Action Order: 0
Execution Order: 1

// ... omitted debug

[12:03:39] DEBUG: revert item update
[12:03:39] DEBUG: revert item update
Error: eosio_assert: Amount must be a multiple of 10
    at eosio_assert

START ACTION
Contract: mycontract
Action: greet
Inline: false
Notification: false
First Receiver: mycontract
Sender:
Authorization: [{"actor":"mitch","permission":"active"}]
Data: {
    "owner": "mitch",
    "message": "XPR Network devs rules!"
}
Action Order: 0
Execution Order: 0

// ... omitted debug

Error: eosio_assert: No ticket found for mitch
    at eosio_assert

// ... omitted debug

START ACTION
Contract: mycontract
Action: greet
Inline: false
Notification: false
First Receiver: mycontract
Sender:
Authorization: [{"actor":"alice","permission":"active"}]
Data: {
    "owner": "alice",
    "message": "XPR Network devs rules!"
}
Action Order: 0
Execution Order: 0

Account alice have 2 ticket(s)
Account alice has posted "XPR Network devs rules!"
Perfect this last run confirms almost everything from our check! This concludes our playground experimentation. Little reminder: Playground don’t replace proper test suites, it’s just a place to play with action from your contract!
# Let’s deploy it!
This is the moment we have been waiting for, making our contract alive on-chain. And guess what, for this we will use… the CLI !
First let’s create an account on testnet, we switch to proton testnet with the following
proton chain:set proton-test
Then, we create our account and output the keys in a json file in the same folder as our contract project, pick a cool account name for yourself. For a project on production remember to exclude the account.json files from commit 🙂
proton account:create coolaccname > account.json
// Below are the interactive prompt for the account:create command
Enter private key for new account (leave empty to generate new key):
Enter email for verification code: cool@gmail.com
Enter display name for account: Cool Name
Enter 6-digit verification code (sent to cool@gmail.com):000000
Great now you account.json should be available in your project folder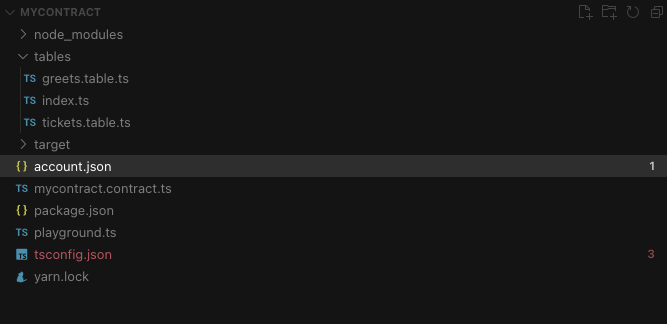
Open it and remove the text outside the JSON body. I suggest you to add an actor field to the JSON with the name you choose for the account. Now save the json file and copy the value of the private field.
Next we will add this private key to the CLI secure storage.
proton key:add paste_your_private_key
// Success: Added new private key for public key: should_be_your_public_key
Sweet, now we are able to push transactions through CLI for the account we have created. So let’s claim faucets to buy ram.
proton faucet:claim XPR your_account_name
// Success: Faucet claimed
And now we buy the 45000 bytes of ram for ourself to deploy our contract
proton buy:ram your_account_name your_account_name 450000
// Success: RAM Purchased
And FINALLY we deploy our contract wasm (-w flag) and abi (-a flag) !
proton contract:set your_account_name ./target
// get abi for eosio
// get abi for eosio
// WASM Successfully Deployed:
// https://testnet.explorer.xprnetwork.org/tx/...
// get abi for eosio
// get abi for eosio
// ABI Successfully Deployed:
// https://testnet.explorer.xprnetwork.org/tx/...
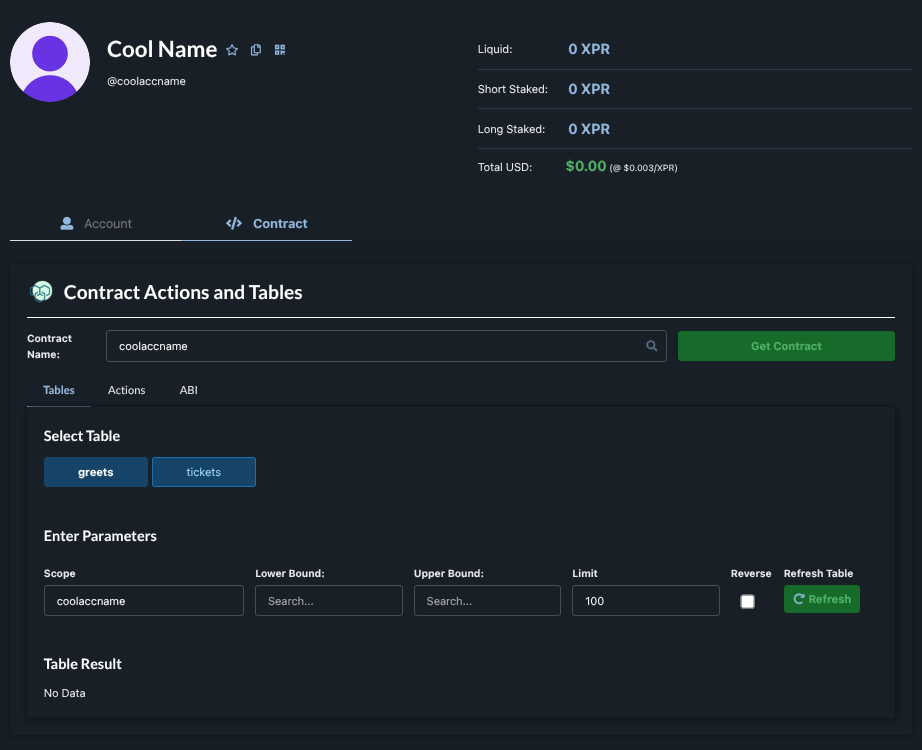
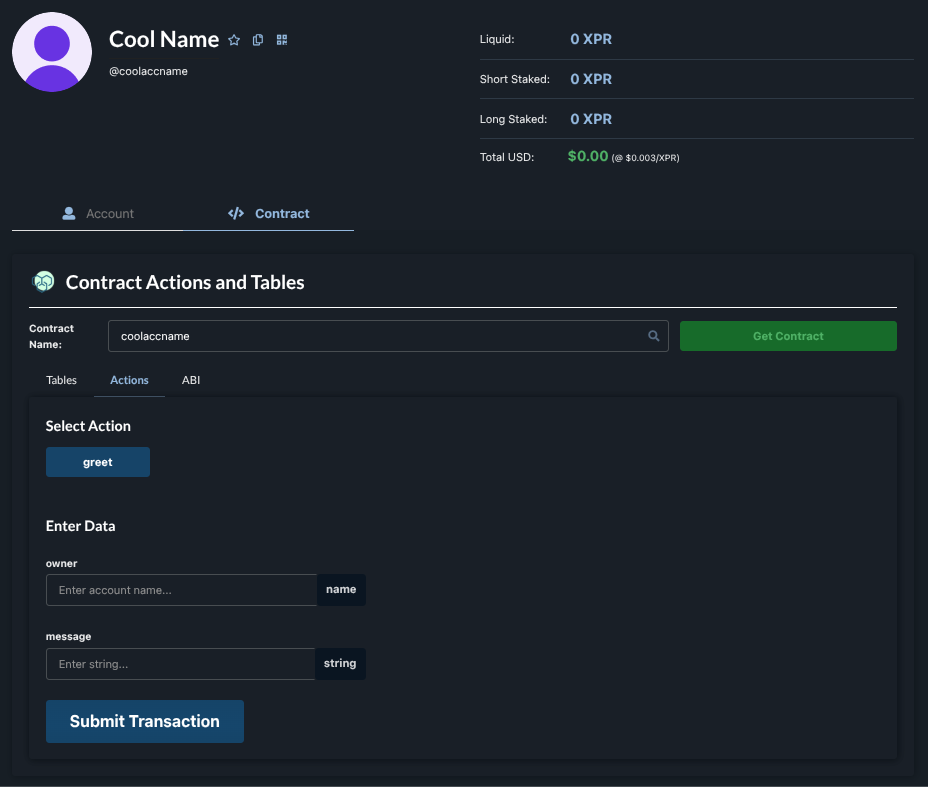
HORRRRAY we did it! Now our contract is living on the testnet ! Visit the link https://testnet.explorer.xprnetwork.org/ (opens new window) search for you account, and go to the contract tab you should have this!
Our tables
Our action, here we just see the ‘greet’ action, because the transfer action is a notification 🙂
Now we can send 10 XPR from webauth testnet to get a ticket and trigger the greet action from the explorer form.
If you don’t have a testnet account, you can repeat the account creation step from the deploy section to create and claim faucet to test it !
# Conclusion
To close this chapter on smart contract development with typescript, as you can see this is really easy to create scalable smart contracts that back your dApp, and create complete on-chain experience on XPR Network. Don’t by shy, code don’t byte, open the proton-tsc package and read the source code, you will surely find interesting concepts,learn more about the way it works and how you can leverage base classes to make advanced smart contracts.